Your wedding day should be a day where you feel as beautiful inside and out as ever. If you are experiencing scarring, enlarged pores, and/or uneven skin tone – suffer no longer!
Scaring plagues many who have experienced acne, as we all try to fight that urge to pick but fail miserably. How can you get rid of those permanent dents once your skin is finally under control and thriving? Many are not interested in expensive evasive procedures with more than a day recovery time. I am not a patient person to start with, so those options were not a right fit for me.
I have seen several selfies on social media (especially of one famous individual) with blood covered faces following a facial. I repeatedly wondered “What IS that!?”. But I think more importantly “EWWW, why would you do that!?”. During my last HydraFacial at MD Wellness Solutions, I brought the photos up asking what treatment they were experiencing. This is when I learned of Microneedling, also known as, DermaPen. The version these individuals experienced was a bit too intense for me, but there was another option!
Microneedling treats scars, wrinkles, large pores, and uneven skin tone. A pen like device with fine needles is used to puncture the skin creating thousands of tiny channels to allow serums to reach deeper skin layers. I did some research as I was a bit nervous to get this treatment, unsure of what I was going to experience during and afterwards. I became the guinea pig for some of my friends and decided to give a whirl! What could I lose, right?
Who could I trust more with something I was nervous about than the wonderful ladies at MD Wellness Solutions. I am now going to walk you through the process (including pictures), and hopefully take away any worries you might currently be experiencing with trying this treatment.
Pictures are taken of your skin prior to this treatment so that progress can be tracked. (The “after” pictures in my previous post “Invest in your skin!” were taken prior to this treatment.)
Step 1 – Skin Cleansing
This step preps the skin by cleansing and removing any products/makeup you are wearing using a Clarisonic® brush. Before pictures are then taken – Smile!
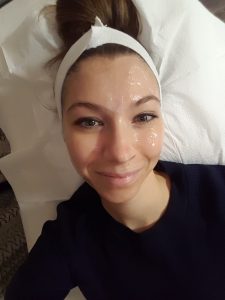 Step 2 – Numbing gel
A cold Vaseline-type cream is then applied all over your face and sits for approximately 30 mins. I thought it would have frozen my face so that I could no longer show any emotion, but not the case. I could talk, smile, etc.
Step 3 – Open your mouth and say ahh…
If you have experienced cold sores or fever blisters, they highly recommend that you take a prescription that will stop a flare up after the treatment due to the treatment including the use of needles.
Step 4 – Serum concoction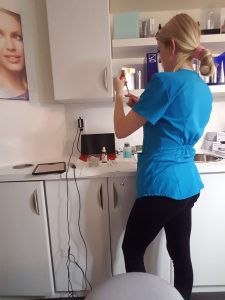
Based on the discussions with your dermatologist, a concoction of serums will be mixed and applied to your skin. Mine was geared towards acne and anti-aging.
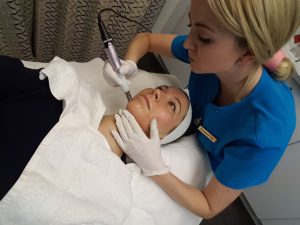
Step 5 – Poke away!
Your treatment is done in sections. The serum is applied to a section of your face, and immediately followed by Microneedling in order to push the serum deep into the layers of your skin. Your first treatment won’t be as deep as your third, it is done in stages. Each section of your face is done one at a time so that the serum isn’t absorbed before the needles are able to work their magic.
I barely felt a thing. It was not even close to how I imagined it. It was surprisingly kind of pleasant and relaxing! I was so hung up on the possibility of my facing looking like the pictures I had seen so I was a bit disappointed that I barely had any pin point bleeding – I wanted gory pictures! Apparently, my lack of pin point bleeding meant I had a lot of collagen in my skin, which is a good thing.
A soothing cream is then applied to assist with protecting your skin from the sun when you leave, and you are given a growth serum to assist in repairing your skin quickly. There are thousands of open tiny channels in your skin, so it’s important not to clog them before they can heal! Always follow the instructions they provide you.
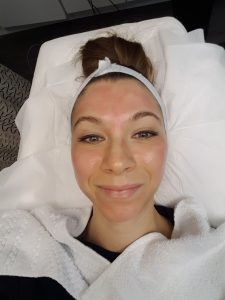
The whole appointment took approximately 1.5 hours. I expected to be out for the remainder of the weekend with a puffy red face, but I really only looked as though I had a mild sun burn.
My skin was back to normal within a couple hours, however, I stayed in for the night and clear of any products and make up for a few days just to make sure my skin was completely healed.
I have noticed a change, although, it takes up to 3 treatments to really experience noticeable improvements. My scars have diminished slightly, skin tone has improved and I now feel able to go without foundation comfortably in public!
So take the plunge! Let your radiant skin shine through on your special day without layers and layers of makeup! There is a solution, and it is attainable.
Contact MD Wellness Solutions and poke your way to better skin!